Arcgis Drawing Circle Edit Area

This is part 2 in our how-to series for ArcGIS Pro. Check out our previous post on georeferencing here: Georeferencing A Site Map
One of the most notable differences between ESRI's ArcGIS Desktop and ArcGIS Pro is the process used to create new shapefiles and feature classes. Apply the walkthrough beneath to learn how to draw your own polygon and create an editable characteristic class in ArcGIS Pro.
Vocabulary:
Feature Grade- A unmarried feature or group of features used to represent an area or point in ArcGIS. Typically, they are either points, lines, or polygons. Feature classes come up in many unlike file types.
Shapefile- A blazon of feature class. The terms feature class and shapefile can be used interchangeably in this how-to.
Coordinate System- This is how we define where to place or locate whatever given point on earth. For GIS, there are projected and geometric coordinate systems which have dissimilar systems for represent locations on earth.
Vertex (Vertices plural)- When drawing a polygon, the vertex will be the corners or where to lines of the polygon come across. A polygon needs at least three vertices to exist.
How to Depict a Characteristic Class in ArcGIS Pro:
This procedure involves 2 basic steps that we have broken into several parts:
- Create an empty shapefile/feature class file
- Draw and salve the polygon boundaries
ane) Create an empty shapefile file
1a) Turn on a basemap and locate your site.
If you accept GPS coordinates, utilize the locate XY tool to zoom to that location. If not, try zooming in and out on the aerial imagery basemap to discover a geographic landmark you recognize (a metropolis, specific roads and intersections, lakes or other bodies of h2o) until you discover your site.
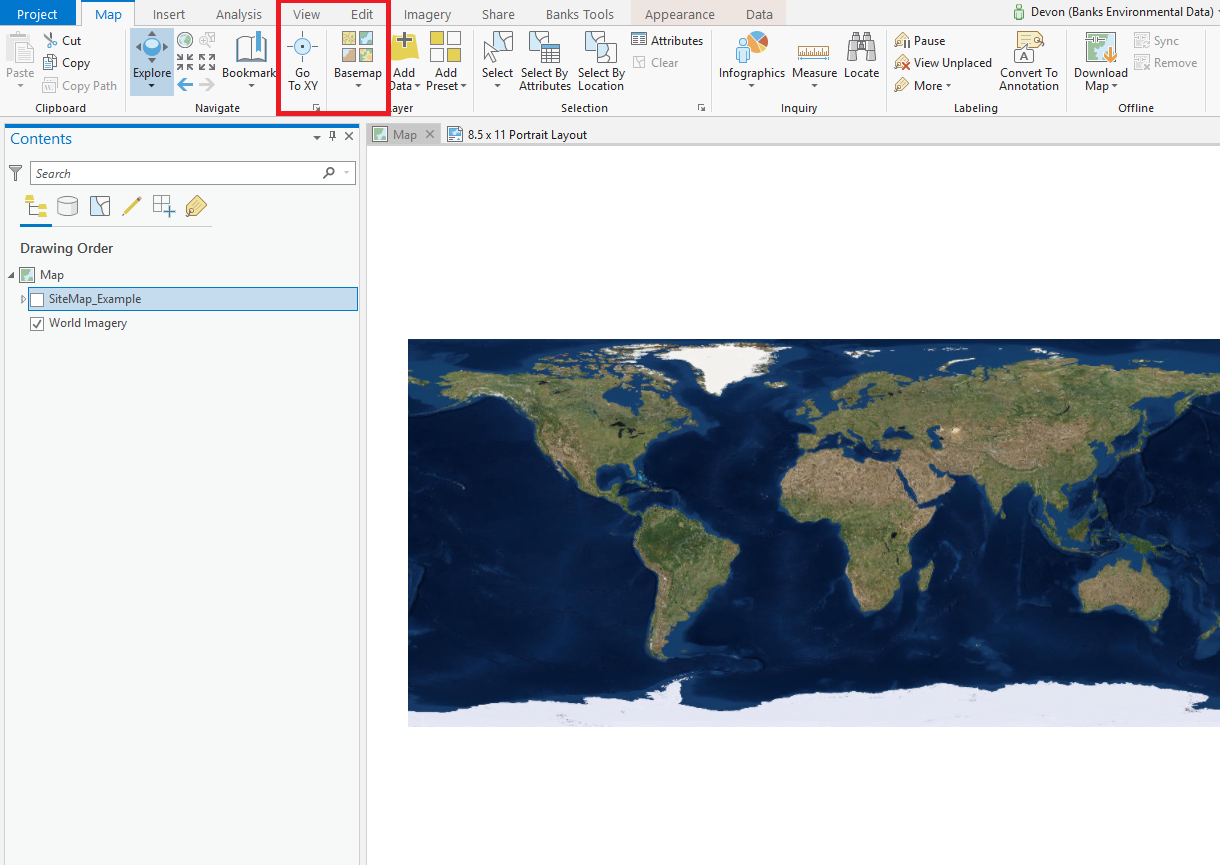
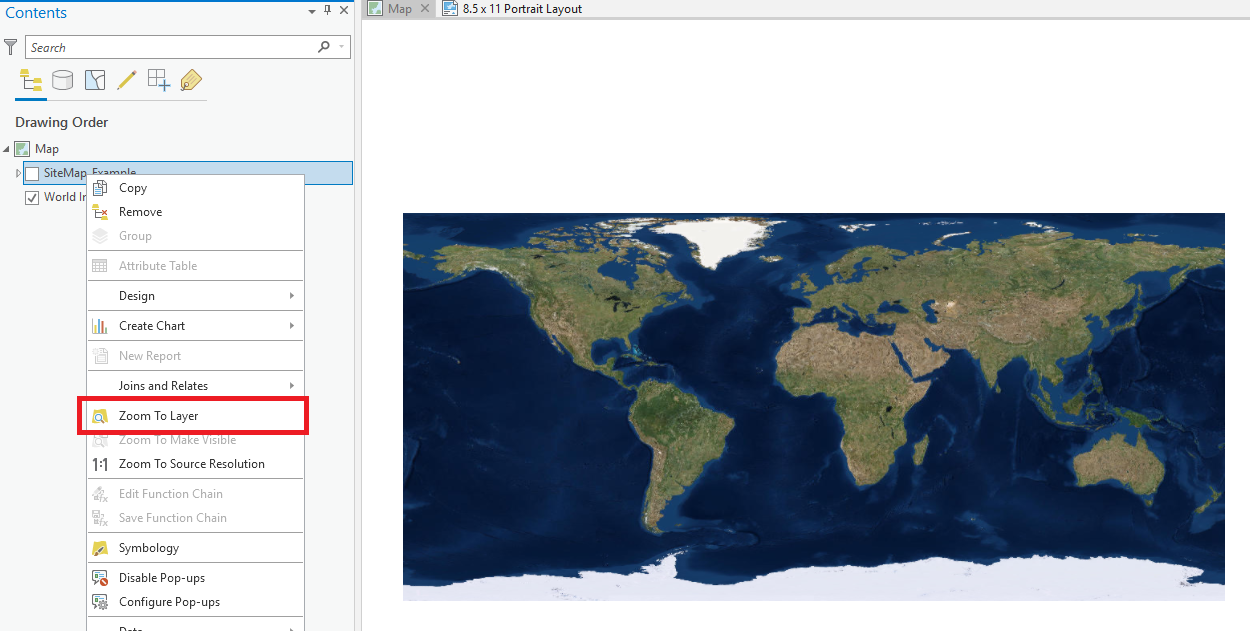
If you are drawing a polygon based on a previously georeferenced image, y'all can right click on the layer in the Contents pane and select "Zoom to Layer".
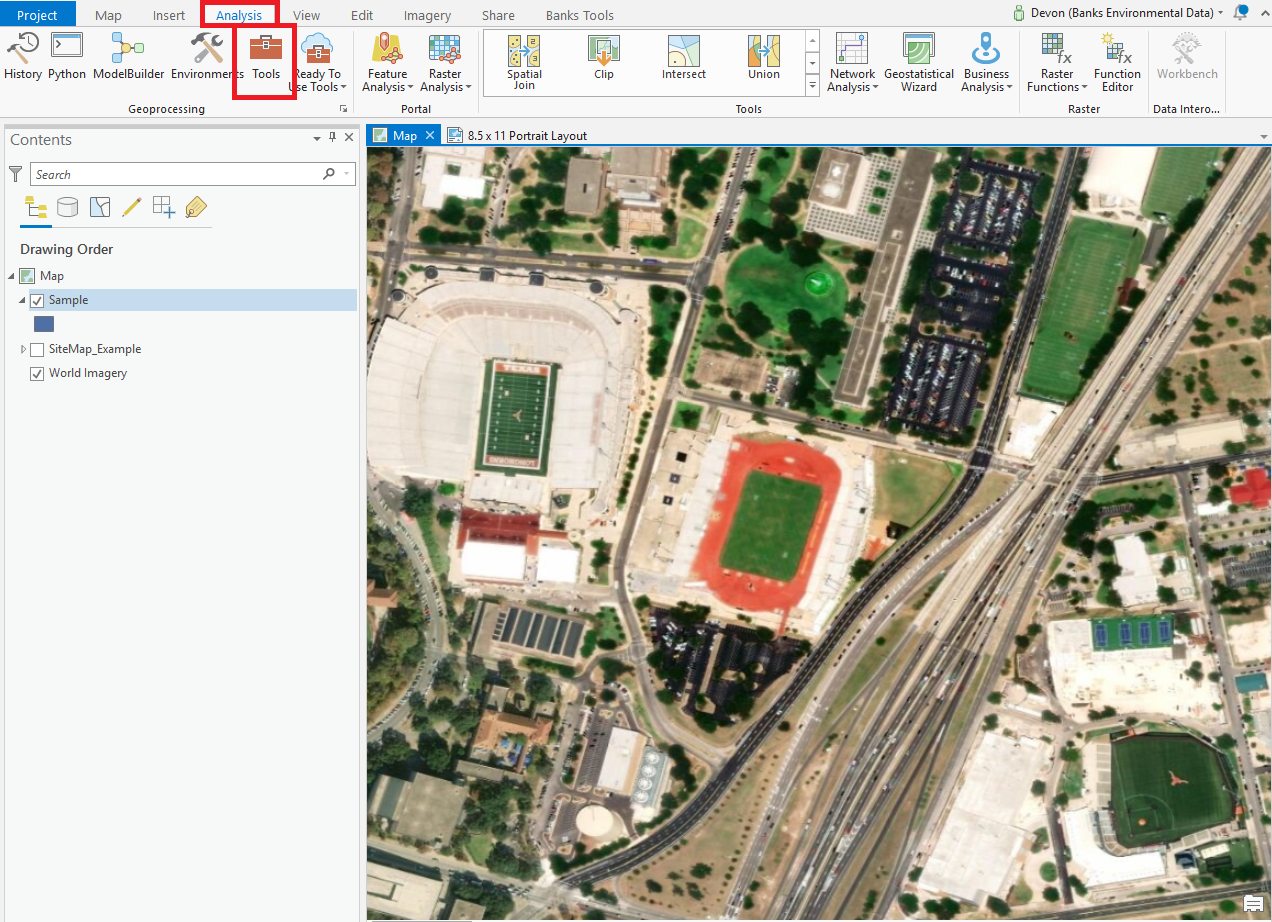
1b) Open the Geoprocessing toolbar and search for 'create characteristic grade'.
To find this locate, the Analysis tab on the Ribbon and click "Tools".
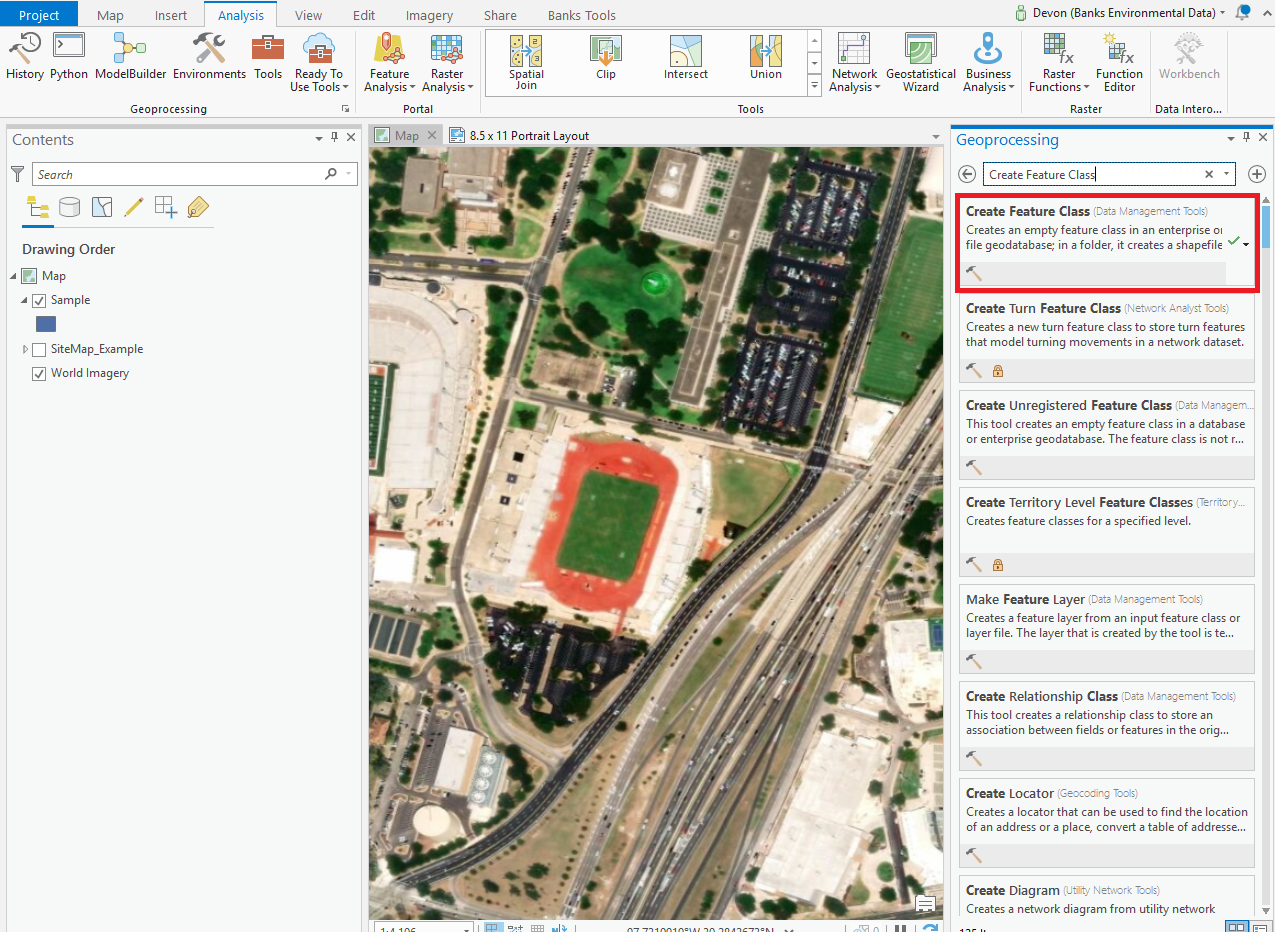
1c) Define your parameters & run the Create Characteristic Class tool.
Beneath, I have highlighted the basic Parameters necessary for creating a basic characteristic class:
- Characteristic Grade Location – this is where your new feature class will be saved. Use the browse button to navigate to the proper save location on your computer.
- Feature Class Name – this is what your new characteristic grade will exist called.
- Geometry Type– is where you select the kind of shape for your new feature course. For the sake of this tutorial, we will be drawing a Polygon, but feel free to explore the other options, as the process is very similar.
- Coordinate System– select whichever coordinate system you need to use in your projection. GCS North American 1983 is used for this tutorial.
- In this case, you can use the default settings for: "Template Characteristic Form", "Has G", "Has Z" and "Feature Course Alias".
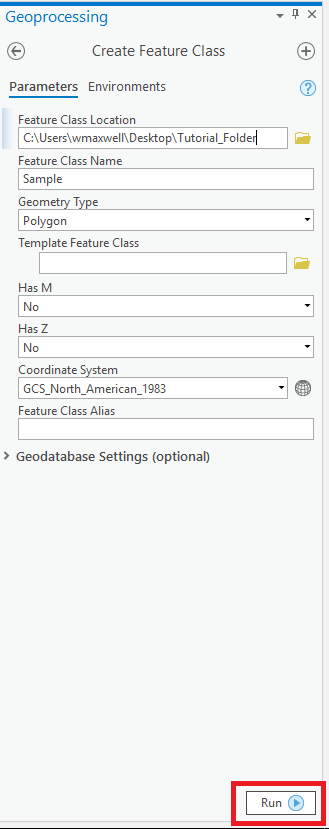
When all your parameters are divers, get to the lesser correct and select "Run". This will create an empty characteristic form for you to start calculation polygons to.
2)Depict and save the polygon boundaries
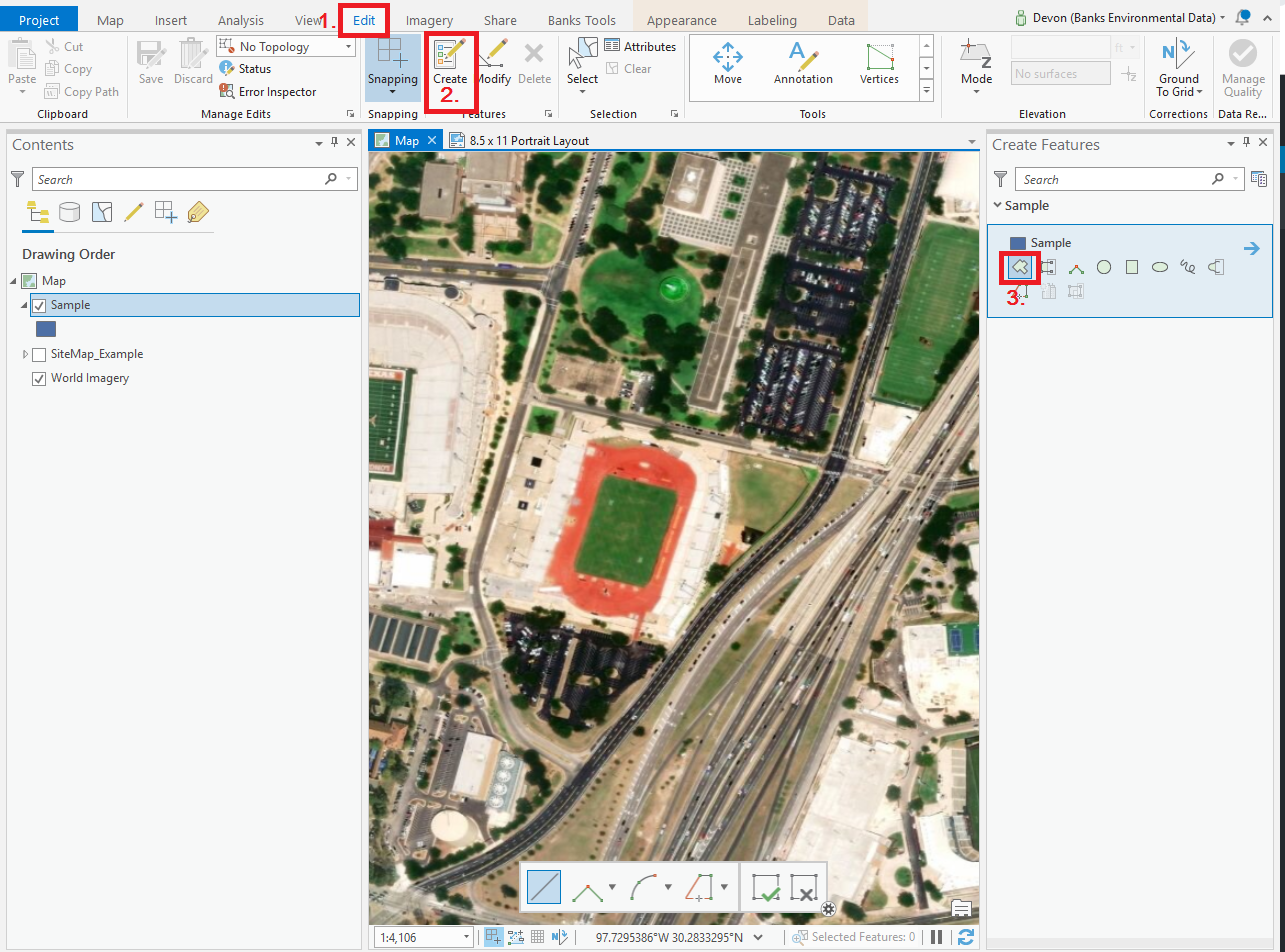
2a) Being to edit your new Characteristic Class.
Afterwards your empty feature class has been created, it will appear in your Contents panel. You may now close out of the Create Feature Grade pane. Navigate to the Edit tab in the Ribbon and select "Create". Select your feature form, and so select "Polygon" (at that place are several drawing tools yous can explore also).
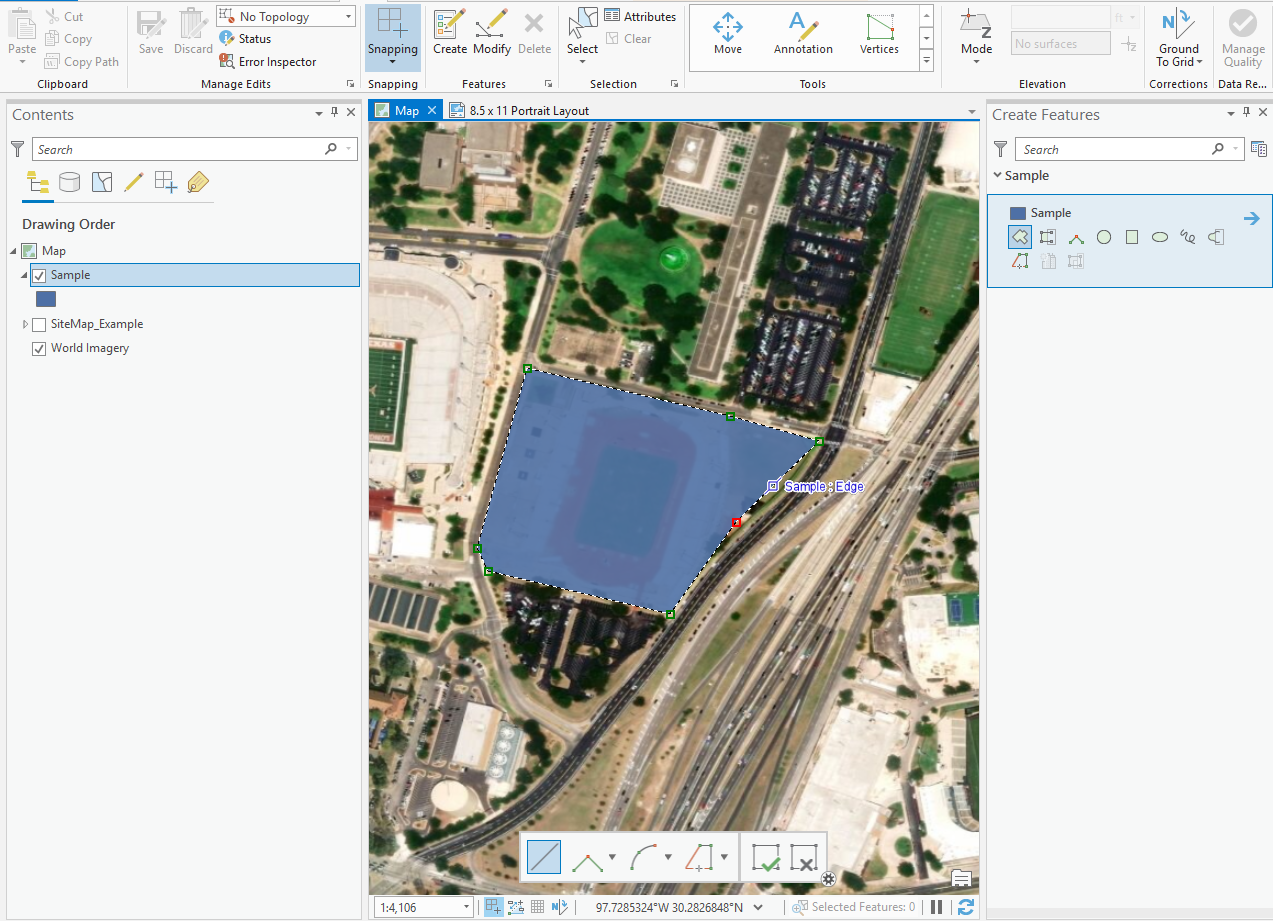
2b) Begin drawing your Feature Class.
Click on the map to identify vertices along the border of your desired shape and double-click when finished. If yous take georeferenced a site map, you can always draw along the borders of your site.
2c) Salve your edits and yous're done!
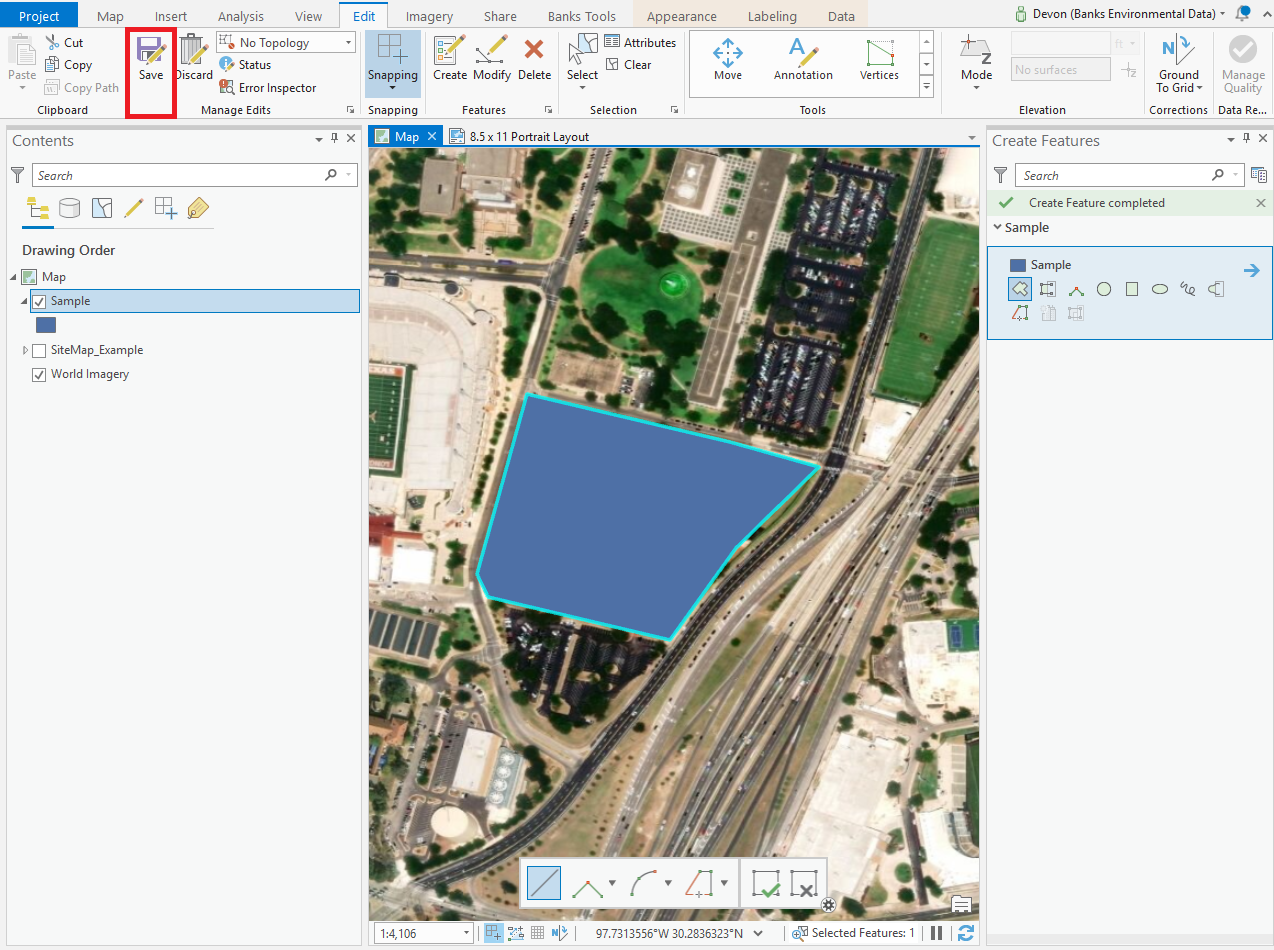
Now, you have created your feature form.
How to Edit a Feature Class in ArcGIS Pro:
If, by an accident, you placed an actress point, or a signal in the incorrect identify, in that location are several options yous accept to correct information technology. Below are solutions for most of your basic fixes.
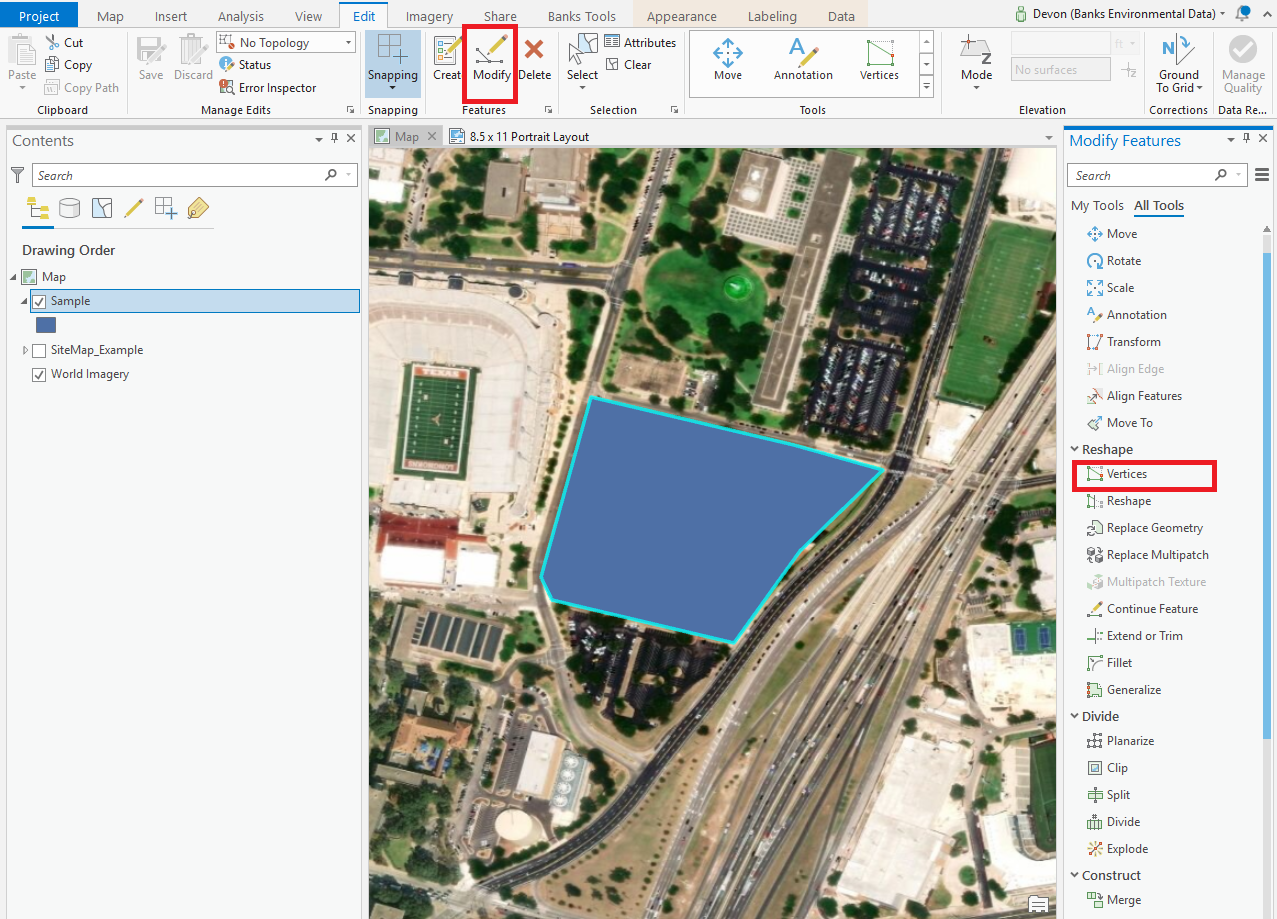
1) Select the "Change" tool in the Edit tab.
This opens a multifariousness of options for you to shape and modify your characteristic class. Here we are going to be focusing on the "Vertices" tool. If for some reason the vertices of your feature course are non appearing, try clicking on your characteristic course. Sometimes, other feature classes in a projection will exist selected in your editing session.
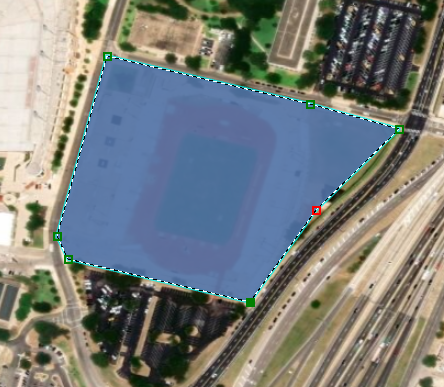
two) Move vertices.
In the "Normal" function of this tool, yous may select any vertex by clicking on it and dragging information technology to your newly desired location to update your polygon.
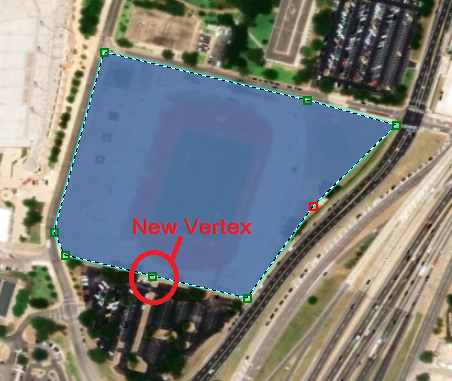
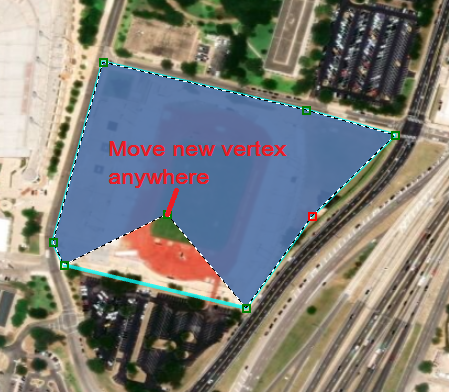
3) Add/delete vertices.
In the "Add together" office of this tool, you lot tin can create a new vertex anywhere on the edge of the polygon. Click on the new vertex to select information technology and then elevate it into a desired location.
In the "Delete" function of this tool, you can delete any existing vertex.
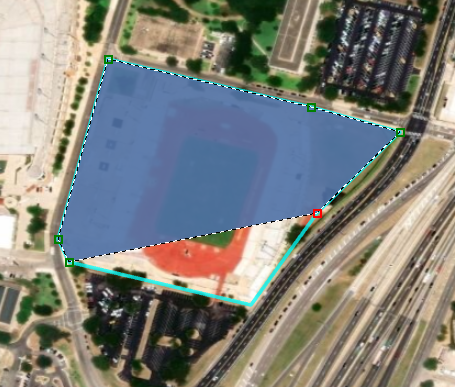
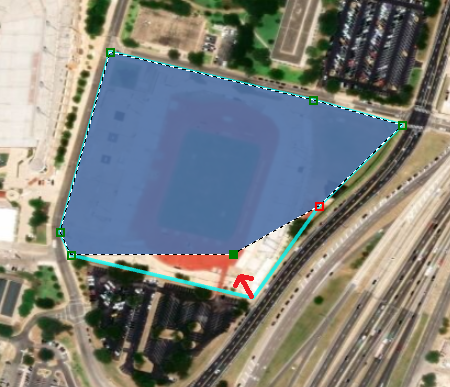
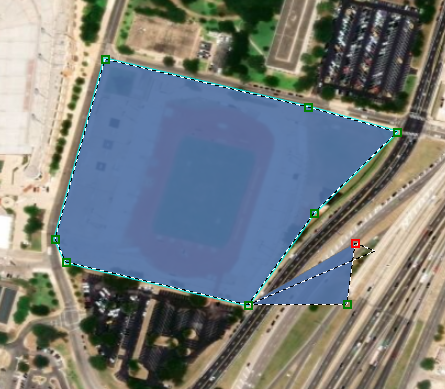
4) Continue building feature
In the "Continue Feature" function of this tool, you can easily add larger areas or sections to your feature. I accept found it easier to get-go and cease on existing vertexes.

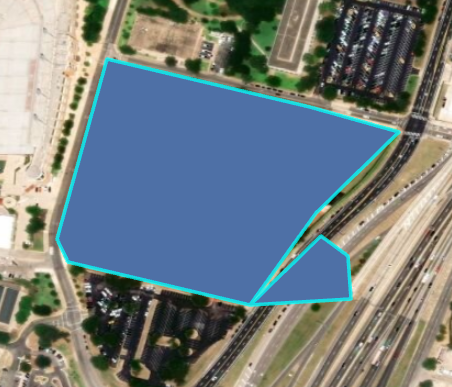
five) Salve all edits.
For more information:
https://pro.arcgis.com/en/pro-app/assistance/data/characteristic-classes/create-a-feature-form.htm
Will Maxwell
wmaxwell@banksinfo.com
This entry was posted in Analysis, GIS, Applied science and tagged ArcGIS Pro, ESRI, GIS, Shapefiles. Bookmark the permalink.
mcallisterowareasti.blogspot.com
Source: https://www.banksinfo.com/blog/draw-edit-feature-class-arcgis-pro/
0 Response to "Arcgis Drawing Circle Edit Area"
Post a Comment